Today, I’ll introduce my first Unity 3D project, the classic Roll-a-Ball game.
Unity Setup
If you’re interested in how to set up Unity, check out my Set up Unity. I cover everything from downloading Unity Hub to configuring the environment for this project.
Building the Basics
Setting the Scene:
- I created a new 3D project in Unity and got started by adding a flat Plane as the ground.
- Resized it to
(2, 1, 2)to give our rolling ball plenty of space to move.
Adding the Player:
- Next, I created a Sphere object and named it Player.
- Moved the sphere up slightly by setting the Y coordinate to
0.5. This gave it a realistic “standing” position on the ground.
Adding the Rigidbody Component:
- To enable physics interactions, I added a Rigidbody component to the Player object. This step allows the ball to respond to forces and gravity.
Creating a Player Controller Script:
- I added a script called PlayerController.cs to manage the ball’s movement.
using UnityEngine;

public class PlayerController : MonoBehaviour
{
    public float speed = 10;
    private Rigidbody rb;

    void Start()
    {
        rb = GetComponent<Rigidbody>();
    }

    void FixedUpdate()
    {
        float moveHorizontal = Input.GetAxis("Horizontal");
        float moveVertical = Input.GetAxis("Vertical");

        Vector3 movement = new Vector3(moveHorizontal, 0.0f, moveVertical);
        rb.AddForce(movement * speed);
    }
}
This script got the ball rolling!
Setting Up the Camera
For a more immersive experience, I wanted the camera to follow the player. Initially, I tried making the Main Camera a child of the Player object, but that led to a weird, shaky view. So instead, I wrote a CameraController script that allowed the camera to follow the ball smoothly, using a fixed offset.
public class CameraController : MonoBehaviour
{
    public GameObject player;
    private Vector3 offset;

    void Start()
    {
        offset = transform.position - player.transform.position;
    }

    void LateUpdate()
    {
        transform.position = player.transform.position + offset;
    }
}
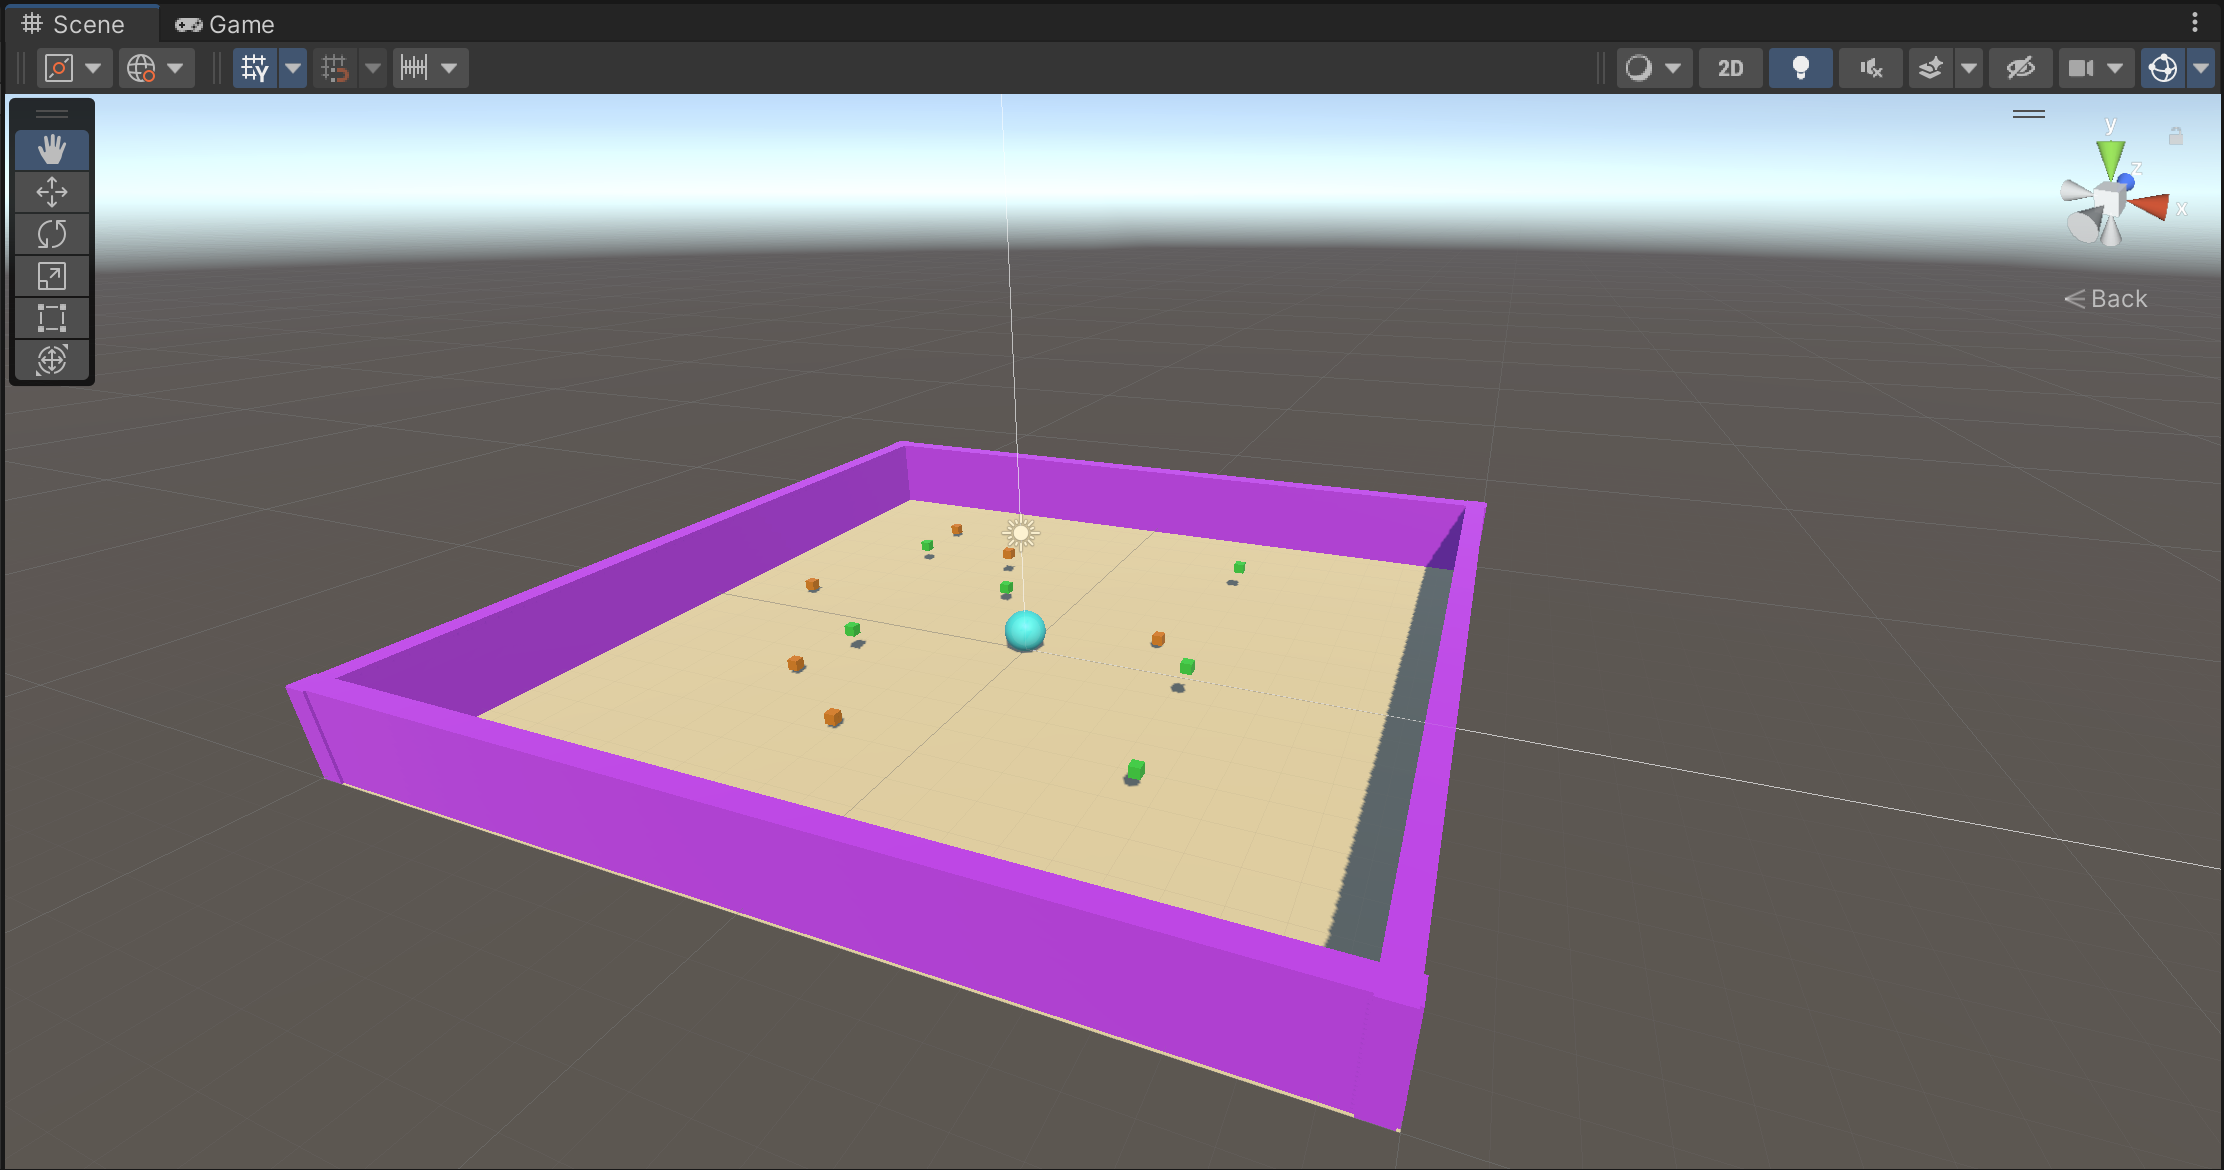
Adding the Pick-Ups with Score Variations
I added two types of collectible cubes: PickUpGreenParents and PickUpOrangeParents. Each of them affects the score differently:
- Green Pick-Ups: When the player collects these, the score increases by +1.
- Orange Pick-Ups: Collecting an orange pick-up decreases the score by -1.
Creating Prefabs for Green and Orange Pick-Ups
- I created one green and one orange cube, then saved them as separate prefabs:
PickUpGreenParents(colored green) andPickUpOrangeParents(colored orange). Prefabs made it easy to duplicate and spread these objects around the scene while keeping the setup consistent.
- I created one green and one orange cube, then saved them as separate prefabs:
Configuring Collider and Trigger
- Each prefab was tagged with
PickUpGreenParentsorPickUpOrangeParentsso I could handle them differently in the script. I also added a Collider component to each with “Is Trigger” enabled.
- Each prefab was tagged with
Updating the PlayerController Script
- To manage scoring, I modified the PlayerController script to check each collected object’s tag. Based on whether the tag was
PickUpGreenParentsorPickUpOrangeParents, the script either increased or decreased the score.
- To manage scoring, I modified the PlayerController script to check each collected object’s tag. Based on whether the tag was
private void OnTriggerEnter(Collider other)
{
    if (other.gameObject.CompareTag("PickUpGreenParents"))
    {
        other.gameObject.SetActive(false);
        count = count + 1;  // Increases score by 1 for green
        SetCountText();
    }
    else if (other.gameObject.CompareTag("PickUpOrangeParents"))
    {
        other.gameObject.SetActive(false);
        count = count - 1;  // Decreases score by 1 for orange
        SetCountText();
    }
}
- Using the SetCountText Method
- I used the
SetCountText()method to update the score display each time a pick-up was collected, so the player sees their updated score in real-time.
- I used the
   void SetCountText()
    {
        countText.text = "Count: " + count.ToString();

        if (count >= 2)
        {
            winTextObject.SetActive(true);
        }
    }
The UI Text Hurdle: Adding the Score and Win Text
Here’s where I had a small error. I wanted to display the score and a “You Win!” message, but Unity wasn’t showing the UI objects. I realized I had forgotten to make the CountText and WinTextObject fields in my script public, which prevented me from linking them in the Inspector. Without these fields being public, Unity can’t display the UI elements on screen, so I was left staring at a blank display.
After making them public, I linked the CountText and WinTextObject objects in the Inspector. Here is the updat code !
public class PlayerController : MonoBehaviour
{
    public float speed = 10f;
    public TextMeshProUGUI countText;
    public GameObject winTextObject;
    private int count;
}
Adding Accelerometer Input for Mobile
I implemented accelerometer-based movement. This allowed the player to control the ball by tilting their device—a great way to enhance gameplay on smartphones!
Enabling the Accelerometer
- To use the accelerometer, I first checked if the device is a mobile device by using an
isMobileBuildflag. I also usedInputSystem.EnableDeviceto activate the accelerometer input when running on mobile.
- To use the accelerometer, I first checked if the device is a mobile device by using an
Updating Movement Logic
- In the
FixedUpdatemethod, I checked for accelerometer data. If it was available, I used that data for movement; otherwise, I defaulted to keyboard input (for desktop testing). Here’s the updatedFixedUpdatecode:
private void FixedUpdate() { Vector3 movement = Vector3.zero; if (isMobileBuild && UnityEngine.InputSystem.Accelerometer.current != null) { // Get accelerometer data for movement Vector3 acceleration = UnityEngine.InputSystem.Accelerometer.current.acceleration.ReadValue(); AccText.text = "Accelerometer: " + acceleration.ToString("F6"); // Display accelerometer data // Map accelerometer data to movement (adjust axes if needed based on phone orientation) movement = new Vector3(acceleration.x, 0.0f, acceleration.y); } else { // Use input from the non-mobile build (keyboard/controller input) movement = new Vector3(movementX, 0.0f, movementY); } // Apply movement force to the rigidbody rb.AddForce(movement * speed); } // Enable accelerometer if running on a mobile device if (isMobileBuild && UnityEngine.InputSystem.Accelerometer.current != null) { InputSystem.EnableDevice(UnityEngine.InputSystem.Accelerometer.current); }- In the
Displaying Accelerometer Data
- To help debug, I displayed the accelerometer data on the screen using a
Textcomponent (AccText). This allowed me to confirm the data being received and adjust the movement accordingly.
- To help debug, I displayed the accelerometer data on the screen using a
Deploying as a Mobile Application
After implementing accelerometer controls, I wanted to test the game on a mobile device. Since I’m using a MacBook and iPhone, I needed Xcode to build and deploy the app.
Xcode Requirement for iOS Testing
- Initially, I planned to use Unity Remote 5 for quick mobile testing. I went to File > Build Settings > iOS > Switch Platform to change the platform to iOS. I also opened Player Settings to configure my project for iOS. However, I discovered that without Xcode installed, Unity wouldn’t let me select iPhone under Editor > Device in Project Settings
Installing Xcode
- To resolve this, I downloaded and installed Xcode from the App Store. This process took a while, but it’s essential for iOS development on Unity.
Using Unity Remote 5 for Quick Testing
- With Xcode installed, I could finally set the platform to iOS and select iPhone under Editor > Device in Project Settings. I downloaded Unity Remote 5 on my iPhone, connected it, and could now use the remote app to test things like accelerometer movement without needing to build and deploy the app.